User Documentation - Automata Deploy InTEGRATION WITH APPLE BUSINESS
CONFIGURING An APPLE BUSINESS macOS Package FOR DEPLOYMENT
The Automata Software Center is the client-side application that must be installed on all of your organization’s managed Macs. This application provides the following features:
Enables the download and installation of managed software and updates.
Enables the installation of optional applications by the end-user via self-service.
Enables the communication of hardware end software inventory for the reporting module.
The easiest way to install this application through Apple Business managed Macs is to configure a macOS Installer Package.
Create a New macOS Package
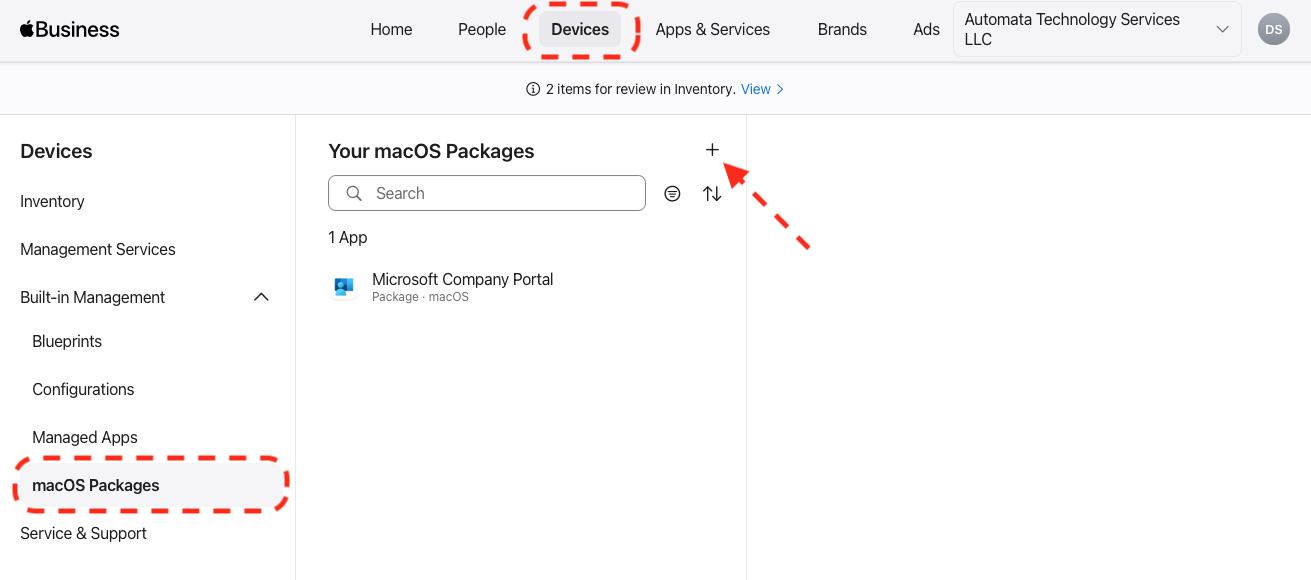
In Apple Business, select Devices from the top menu and select macOS Packages from the sidebar. Click on the plus button (+) to create a new package.
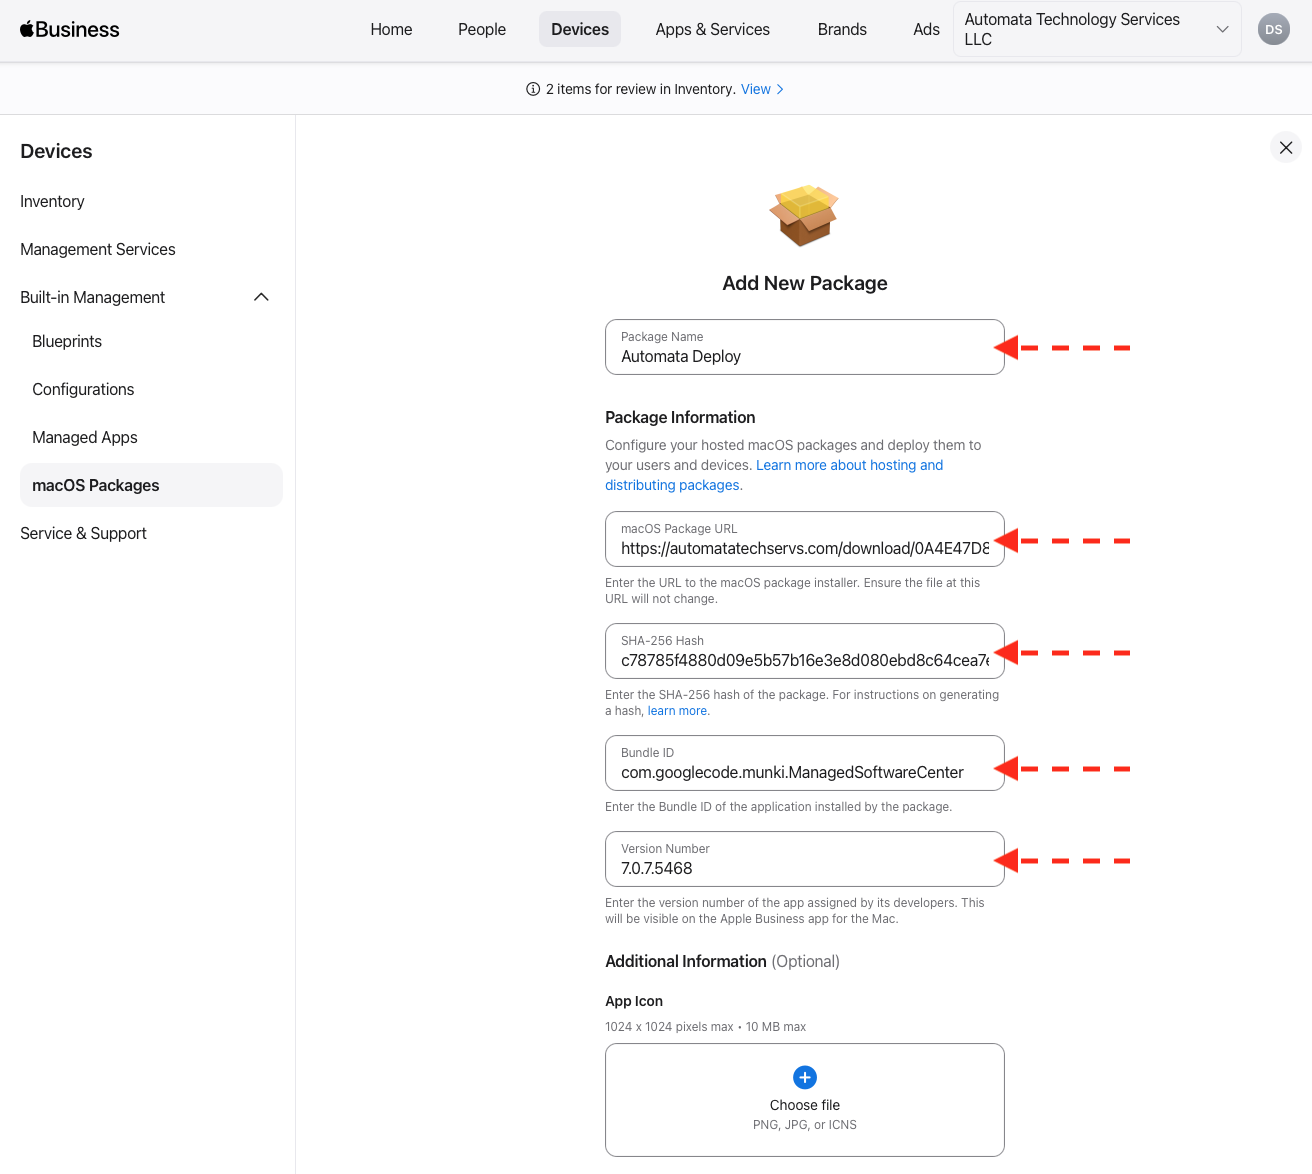
Using the information provided in the onboarding email you received from Automata Technology Services, enter the following information.
Package Name: Automata Deploy or Automata Software Center.
macOS Package URL: This is the path to the installer file provided in the onboarding email.
SHA-256 Hash: Enter the hash information provided in the onboarding email.
Bundle ID: Enter the bundle ID provided in the onboarding email.
Version Number: Enter the version number provided.
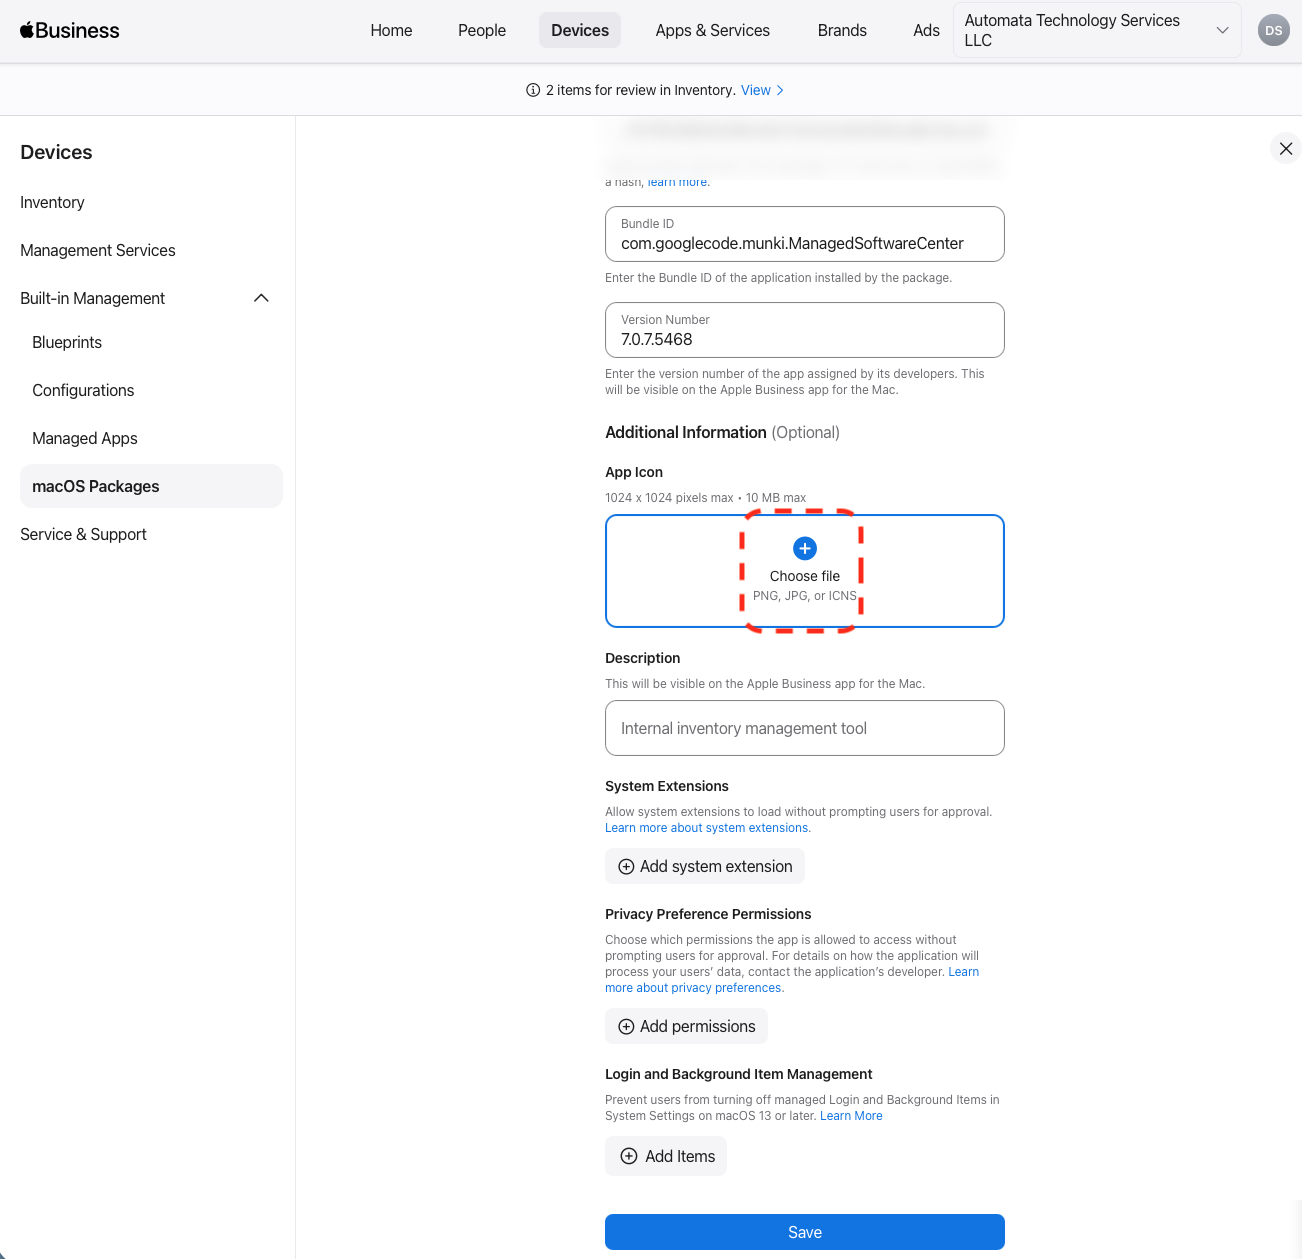
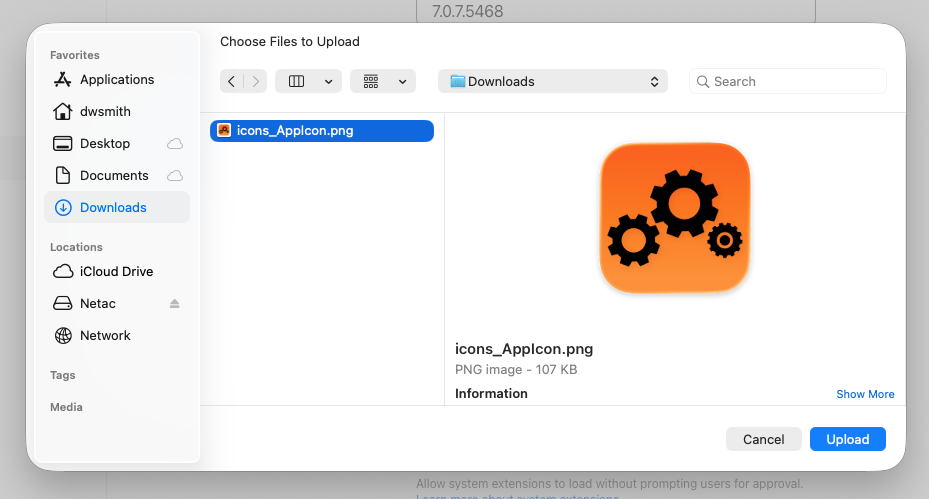
Next, scroll down and click on the plus button to choose an icon file. This is an optional step and the icon is only used in the Apple Business user interface.
You can use any icon you would like here or you can download the official Automata Deploy icon from our website (link included in the onboarding email) and add it here.
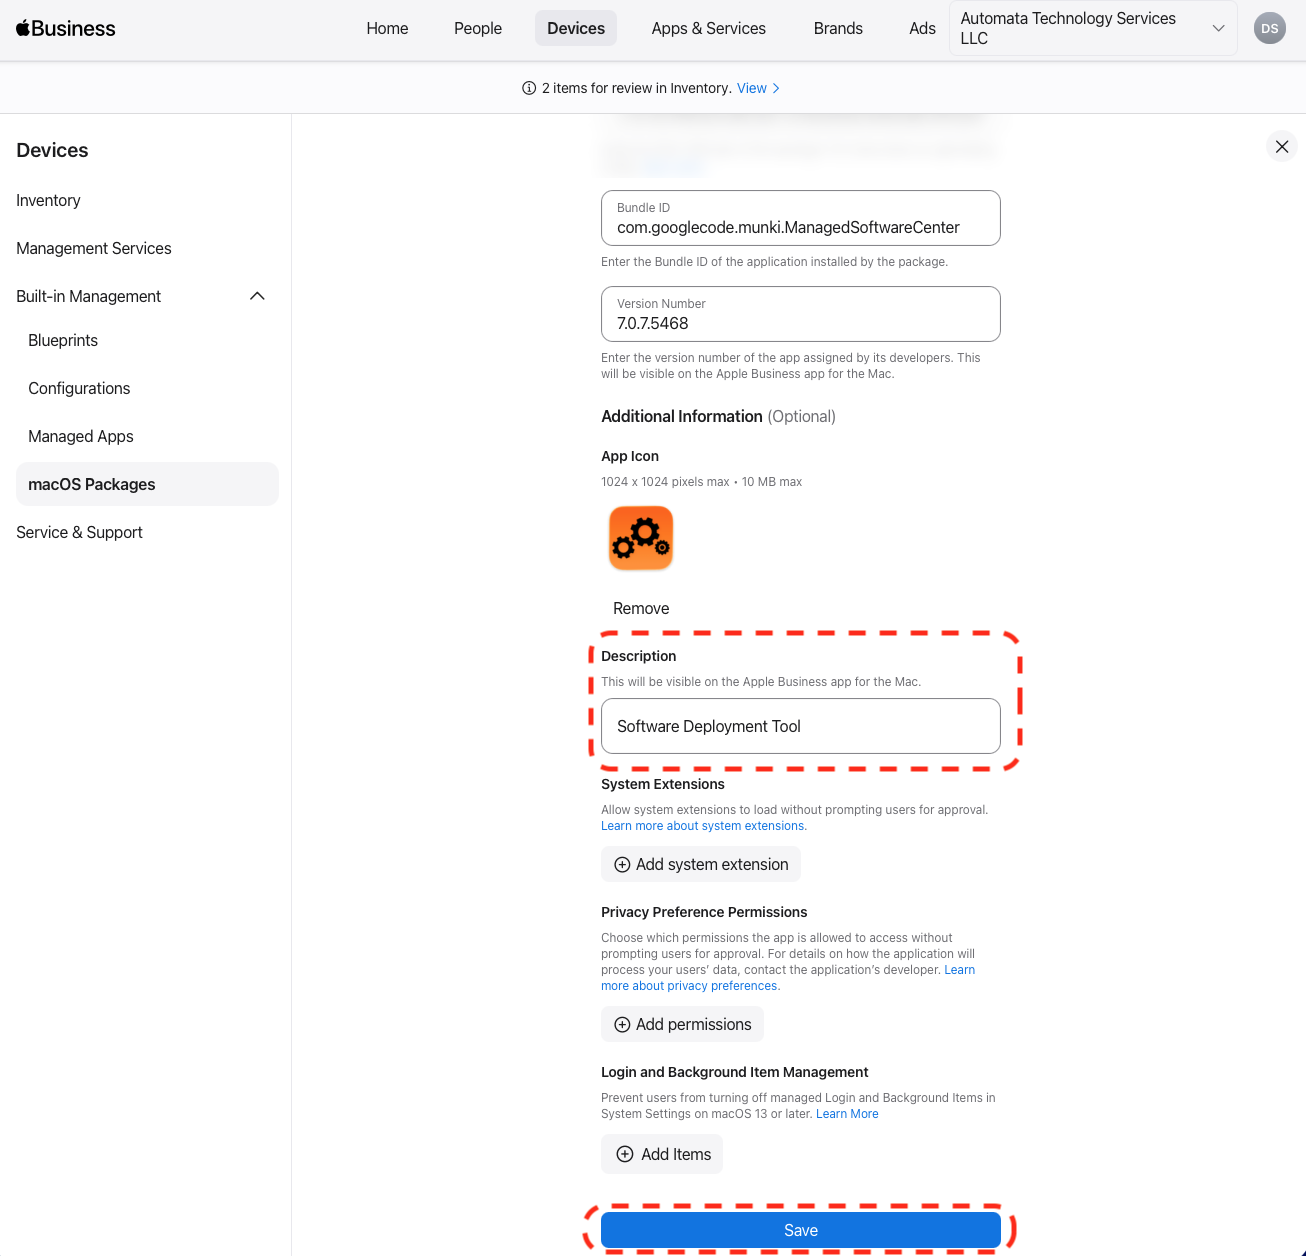
Finally, enter a short description of the application and then click the Save button.
The installer package is now ready for deployment to your managed Macs.
Assign the Install Package to a Blueprint
Once we have the installer package configured, we need to assign the application to one or more Blueprints so it gets installed on our Macs.
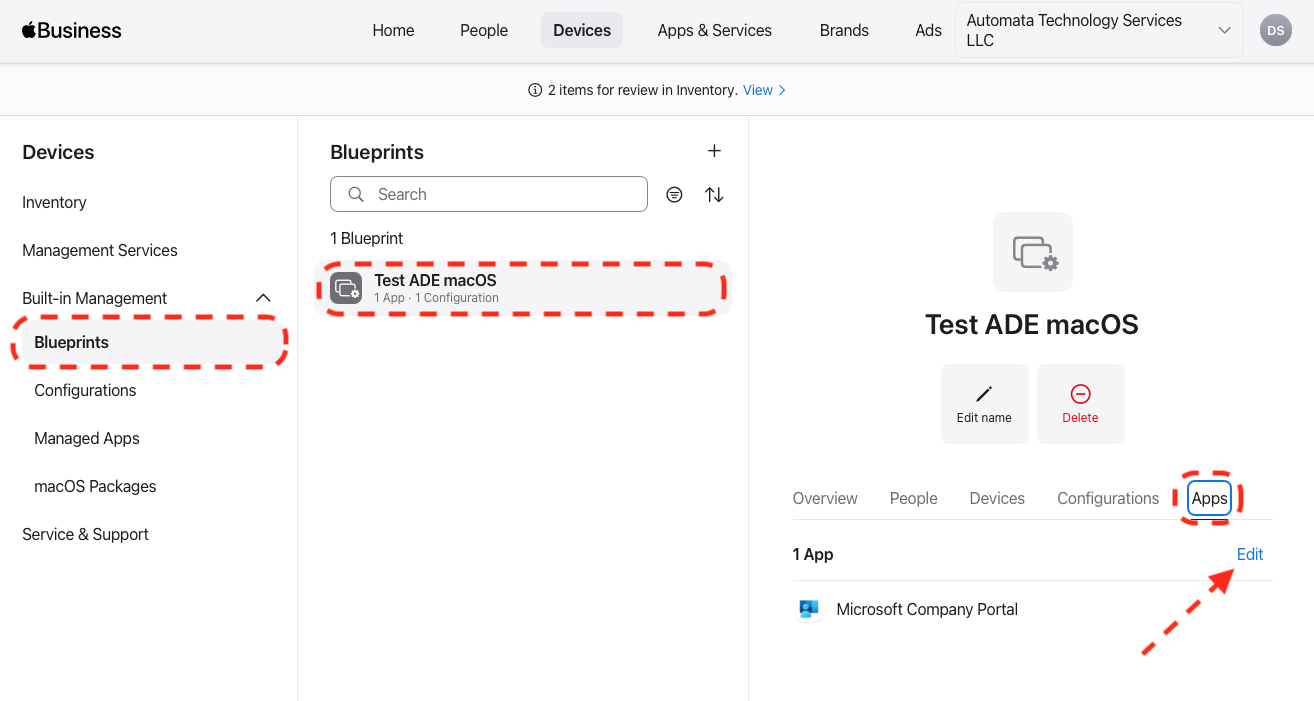
The first step is to find the Blueprint we want to add the installer package to. On the sidebar click on Blueprints, then select a Blueprint and click on the Apps tab on the right panel. Click the Edit button to assign new packages.
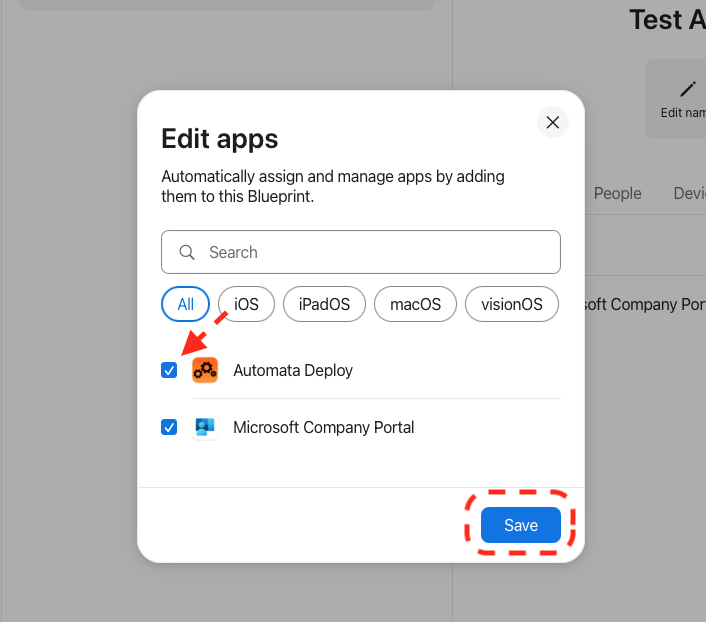
In the Edit apps window the appears, find the Automata Deploy macOS package that we just created and click the checkbox next to the app. Click Save.
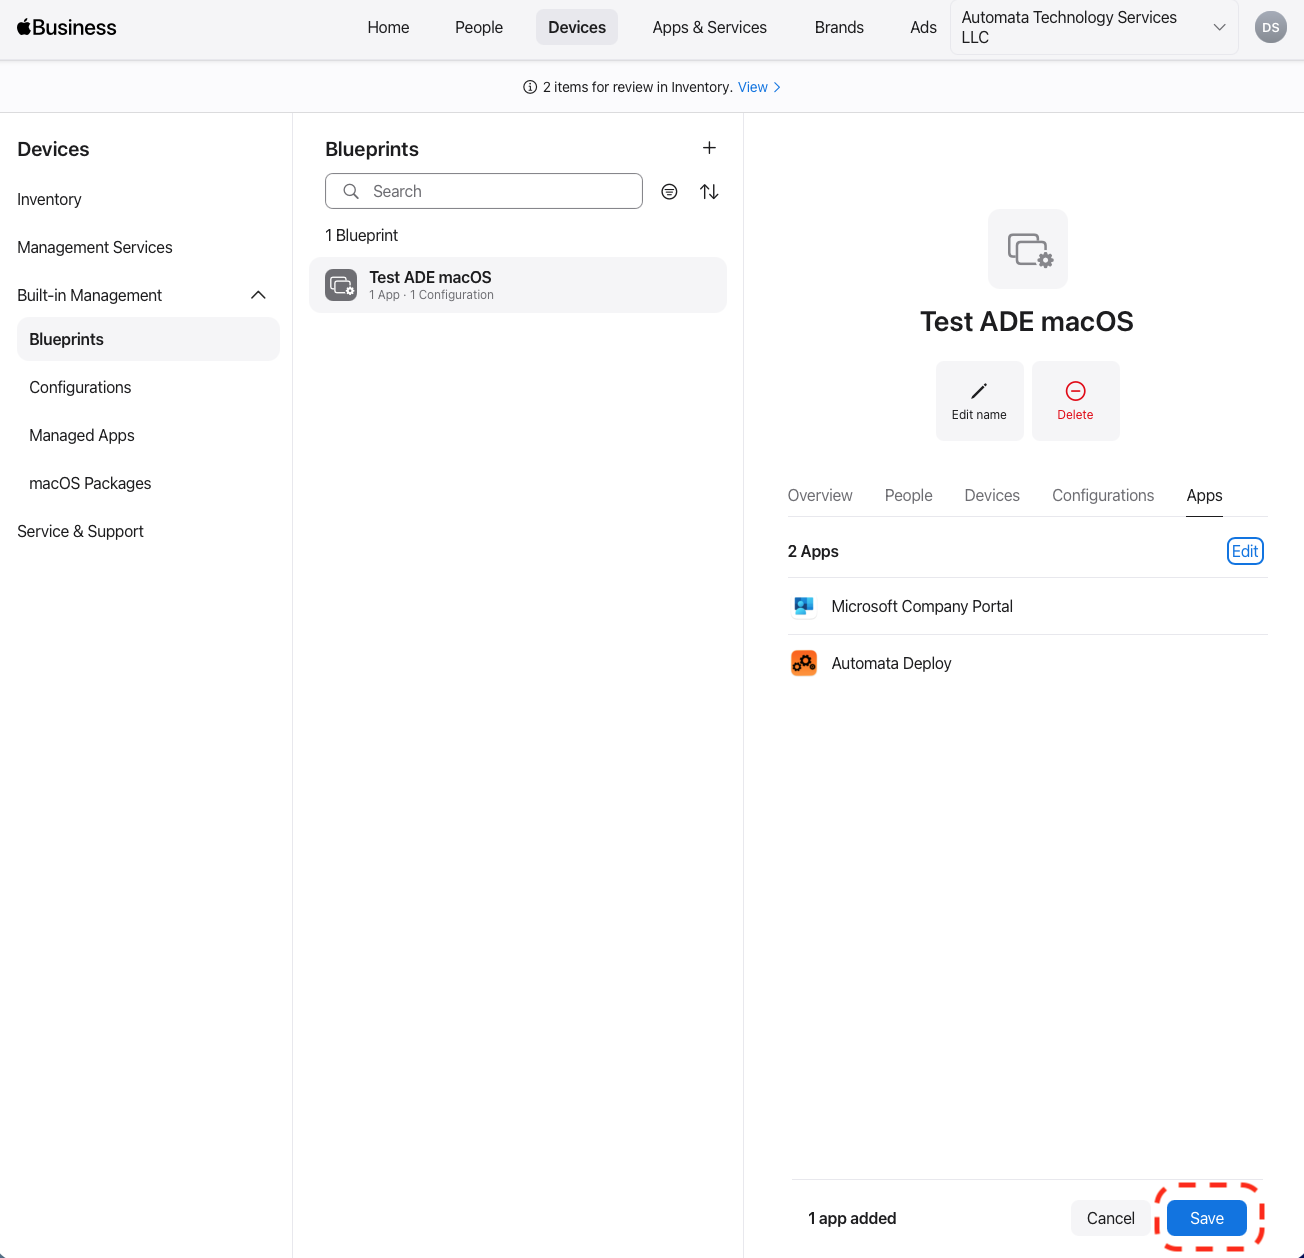
Finally, to save the changes to the Blueprint, click the Save button. Upon saving, Apple Business will attempt to install the Automata Deploy application on any Macs that the Blueprint is assigned to.
Repeat this step for any other Blueprints.
Once the Automata Software Center application is installed on your managed Macs, they will begin to download any applications that were setup to automatically install via the Automata Portal.